Welcome back again, friends!
I’m so glad to see you again! Today, we will introduce you in this chapter about how thermal receipt printer or label printer connect with Windows systerm
Let’s do it~
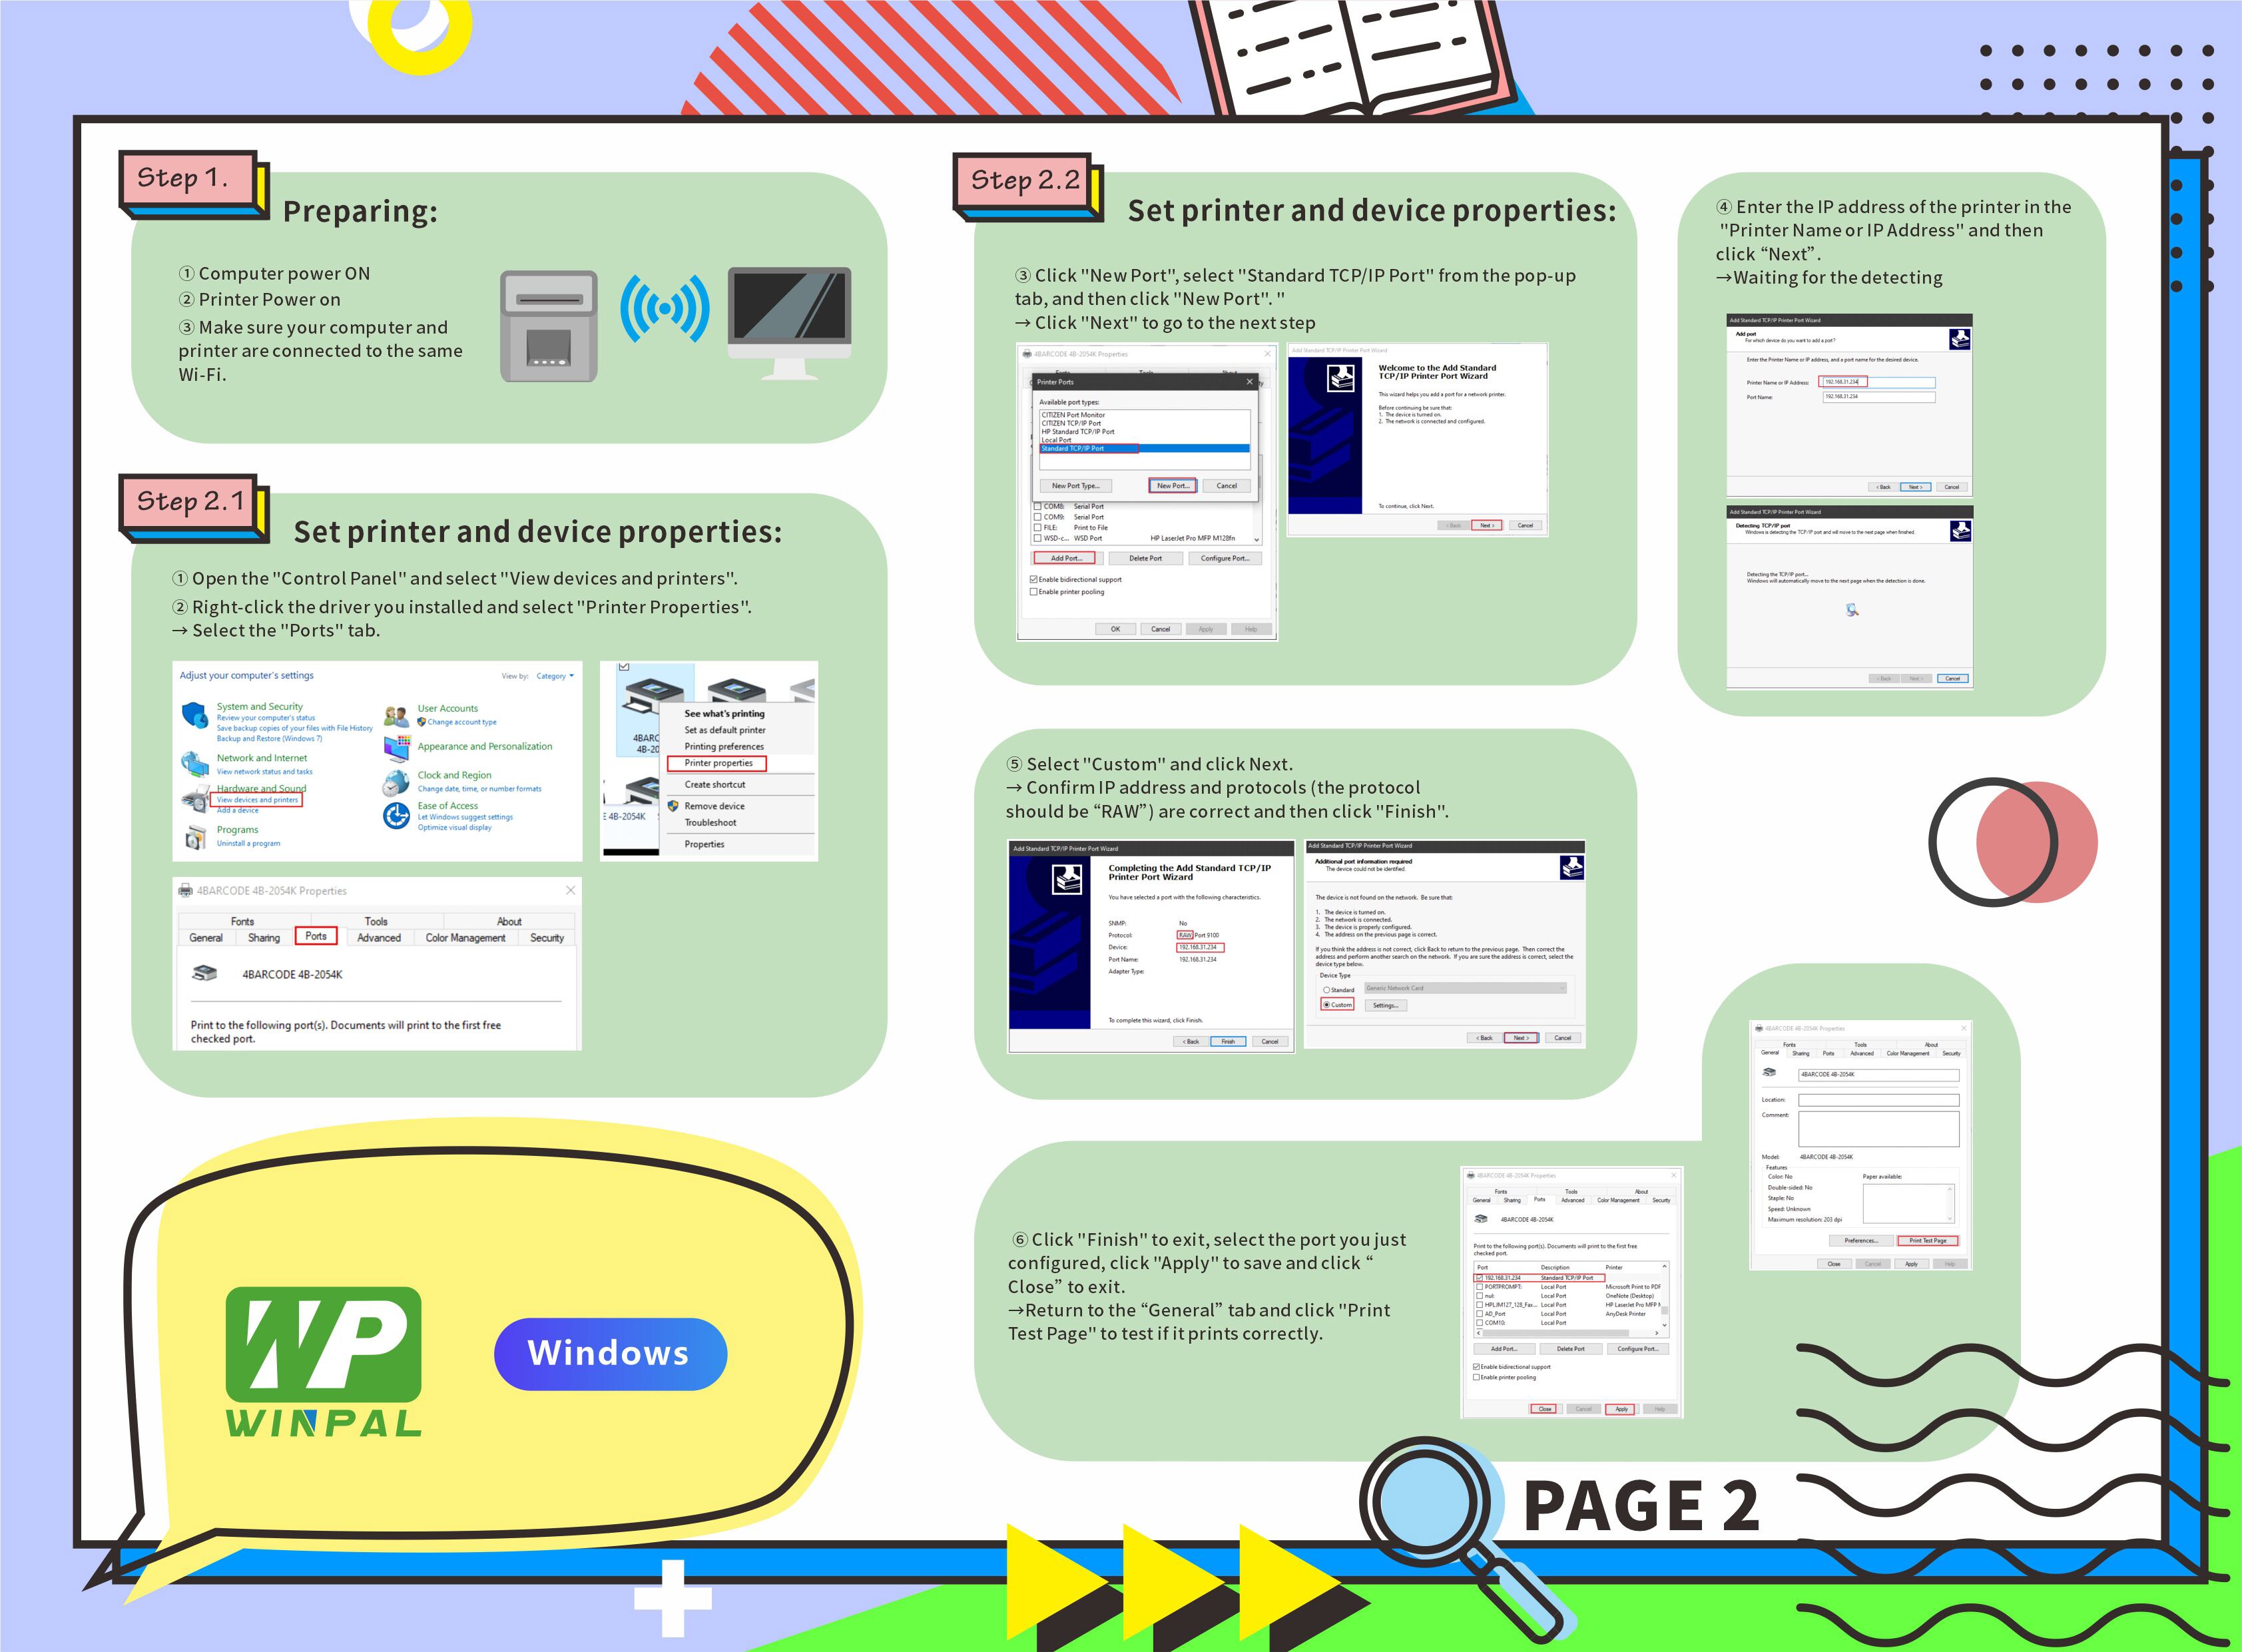
Step 1. Preparing:
① Computer power on
② Printer Power ON
③Make sure the computer and printer are connected to the same Wi-Fi.
Step 2. Set printer and device properties:
① Open the “Control Panel” and select “View devices and printers”.
③ Right-click the driver you installed and select “Printer Properties”.→ Select the “Ports” tab.
④ Click “New Port”, select “Standard TCP/IP Port” from the pop-up tab, and then click “New Port”. ” → Click “Next” to go to the next step
⑤Enter the IP address of the printer in the “Printer Name or IP Address” and then click “Next”.→Waiting for the detecting
⑥ Select “Custom” and click Next. → Confirm IP address and protocols (the protocol should be “RAW”) are correct and then click “Finish”.
⑦Click “Finish” to exit, select the port you just configured, click “Apply” to save and click “Close” to exit. →Return to the “General” tab and click “Print Test Page” to test if it prints correctly.
That’s it. After Install the driver infsuccessfully, set the thermal printer / label printer and device properties, then you can print test page as usual.
But I’d still like to remind you:
Please make sure power on , meanwhile the computer and WINPAL printer are connected to the same Wi-Fi.
Next week, we’ll introduce you about Bluetooth connect. See you soon, my friends!
Post time: May-06-2021


